How Do I Reset My Thermostat After Battery Swap
You’ve just changed your thermostat’s batteries, but something’s not quite right. The display is blank, or worse – your HVAC system isn’t responding at all. If you’re wondering how to reset your thermostat after a battery swap, you’re not alone.
In fact, many users face issues with their HVAC systems after replacing batteries. While some models like the Emerson 1f83c-11np don’t require a reset, others need specific procedures – from power cycling to precise battery manipulation. For instance, some Honeywell thermostats need you to reverse the batteries for 30 seconds before reinstalling them correctly.
Fortunately, most thermostat reset procedures are straightforward. Whether it’s pressing the Nest thermostat’s outer ring for 10 seconds or switching off the circuit breaker for 30 seconds with a Carrier model, we’ll guide you through every step to get your system running smoothly again.
Let’s explore the exact steps to reset your thermostat and solve those post-battery-change blues.
Common Signs Your Thermostat Needs a Reset After Battery Change
After replacing thermostat batteries, several signs indicate a reset might be necessary. Understanding these indicators helps pinpoint the exact issue and its solution.
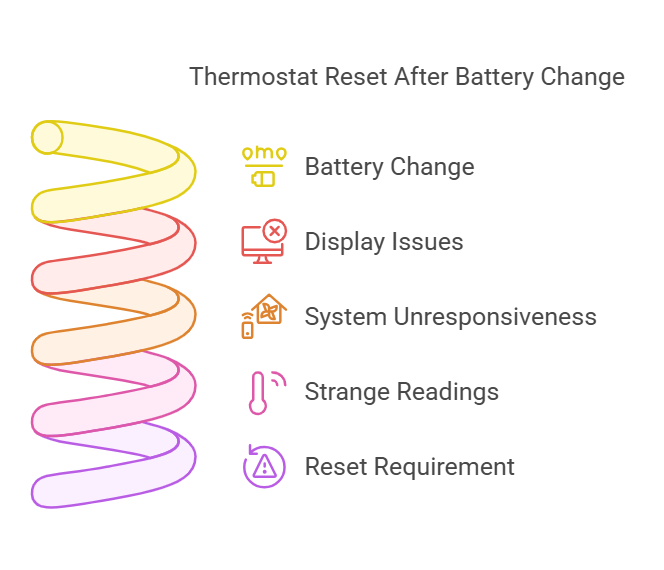
Display issues and error codes
A blank screen after installing new batteries signals the most common reset requirement. Additionally, some thermostats show persistent “Low Battery” messages despite fresh batteries. Error codes often appear as flashing lights or specific symbols, with patterns corresponding to particular issues.
Some models display a triangle with an exclamation mark alongside “fan auto” text, indicating system communication problems. Moreover, firmware glitches can trigger random fault codes, requiring a system reset to restore normal operation.
System not responding to temperature changes
When the HVAC system stops responding to temperature adjustments, this often indicates a communication breakdown between the thermostat and the unit. Pressing buttons yields no response, and programmed settings fail to initiate system changes.
The following issues commonly occur:
- Furnace or AC won’t activate despite clear temperature differences
- System runs continuously without responding to adjustments
- Thermostat appears powered but doesn’t send commands to HVAC system
Strange temperature readings
Temperature reading anomalies frequently surface after battery changes. Specifically, the thermostat might display incorrect readings, such as showing 55 degrees when the room feels significantly warmer. These inaccurate readings persist even when the heating or cooling system operates normally.
Irregular heating and cooling patterns often accompany these strange readings. Furthermore, the system might show outdated time settings alongside incorrect temperatures, suggesting a complete reset of the internal memory is needed.
Power supply issues can cause these temperature reading irregularities. Consequently, checking for proper battery installation and terminal cleanliness becomes crucial. Electrical fluctuations might also impact the thermostat’s internal programming, leading to erratic temperature displays.
Basic Reset Steps After Installing New Batteries
Resetting your thermostat requires a systematic approach to ensure proper functionality. Let’s walk through the essential steps to get your system back online.
Power cycling the thermostat
Power cycling helps clear any residual charge and reset the internal programming. Initially, switch the thermostat to the off position. Subsequently, locate and turn off the circuit breaker that powers your HVAC system. Wait for 30 seconds, then restore power to the breaker. This process often resolves basic programming issues and restores normal operation.
Checking battery installation
Proper battery placement is crucial for optimal performance. First, remove the outer cover to access the battery compartment. Next, examine the battery slots carefully – some thermostats have misleading polarity indicators. Place the batteries according to these guidelines:
- Match the plus and minus signs on the label with the battery terminals
- Insert batteries with the positive terminal facing upward
- Ensure the battery door closes completely
For stubborn connections, placing small pieces of aluminum foil on the battery contacts can enhance connectivity.
Verifying connections
After installing batteries, check all connections thoroughly. Remove the faceplate and inspect for any loose wires or disconnected components. Pay particular attention to the R wire, which supplies power to the system. A multimeter can help verify proper voltage – you should read between 6VAC to 30VAC between the R and C wires.
The thermostat should display information once properly connected. If the screen remains blank, try these steps:
- Clean the battery contacts using a small wire brush
- Test different battery brands, as some thermostats require stronger batteries
- Check if the serviceman switch is in the ON position
Remember to handle the thermostat components with care, particularly if dealing with older mercury-based models. After completing these steps, your thermostat should function normally. However, frequent battery replacements might indicate a need for thermostat replacement.
Brand-Specific Reset Procedures
Different thermostat brands require unique reset procedures after battery replacement. Let’s examine the specific steps for major manufacturers.
Honeywell thermostat reset steps
Honeywell thermostats offer a distinctive battery reversal reset method. First, remove the batteries and place them in reverse polarity for 30 seconds. Afterward, reinstall the batteries in their correct position to initiate a system reboot. Alternatively, press the system button, followed by holding the center blank box, and finally press done.
For stubborn “Low Battery” messages that persist after battery replacement, clean the metal contacts with an emery board. Remember to use alkaline batteries exclusively, as rechargeable or lithium batteries might cause operational issues.
Nest thermostat reset process
Nest thermostats primarily use a simple physical reset method. Press the outer ring for 10 seconds until the screen turns off. Once the screen goes dark, release the ring and press it again briefly to complete the restart process.
Notably, Nest thermostats differentiate between a restart and reset:
- A restart maintains your settings, similar to rebooting a computer
- A reset erases personal settings and restores factory defaults
For battery-powered Nest models, remove the unit from its base, take out the batteries, then reinstall them to initiate a fresh start.
Other popular brands reset instructions
Trane thermostats utilize a unique reset sequence – press and hold both fan and cool buttons simultaneously for 10 seconds. This action triggers the system reset mode.
For Emerson models, primarily nonprogrammable versions, changing the batteries typically completes the reset process automatically. In cases where programming issues persist, using the HOLD function can override scheduling complications.
When dealing with any brand, ensure proper battery installation and verify the connections before attempting a reset. Should these brand-specific procedures fail to resolve the issue, consider checking for battery terminal corrosion or consulting the manufacturer’s support documentation for advanced troubleshooting steps.
Troubleshooting When Reset Doesn’t Work
First of all, when standard reset procedures fail to resolve thermostat issues, deeper troubleshooting becomes necessary. Let’s examine advanced solutions that often solve persistent problems.
Checking for battery corrosion
Battery corrosion manifests as a crusty crystallization around batteries and terminals. This buildup occurs primarily due to aging batteries releasing potassium hydroxide through their vents. Generally, corrosion prevents electrical current flow between batteries and device components, ultimately leading to system failure.
To address corrosion:
- Wear protective gear including gloves and eye protection
- Work in a well-ventilated area during cleaning
- Use vinegar to neutralize alkaline battery residue
- Clean contact points with a soft brush
Warning: Battery acid can cause chemical burns upon contact with skin or eyes.
Verifying proper battery type
Thermostats require specific battery types for optimal performance. Most programmable models use one of these options:
- Standard AA or AAA alkaline batteries
- Button-style 3V lithium batteries
- 9-volt batteries
Nevertheless, some models demonstrate particular preferences. For example, certain units function better with specific brands – as evidenced by cases where Panasonic batteries failed while Energizer and Duracell worked perfectly.
Testing system power
Primarily, system power issues manifest through various symptoms. A properly functioning thermostat should read between 6VAC to 30VAC between the R and C wires. Therefore, using a multimeter becomes essential for accurate diagnosis.
As a result of power problems, you might encounter:
- Blank displays despite new batteries
- Frequent battery replacements
- Loss of programmed settings
To verify system power:
- Locate the red (R) and blue (C) wires
- Test voltage using a multimeter
- Check furnace LED indicators for error codes
Important: Always disconnect main power before handling internal wiring. The 24-volt transformer in your furnace controls multiple devices through the logic board, making proper power management crucial for system functionality.
When to Call a Professional
Professional intervention becomes essential once basic troubleshooting steps fail to resolve thermostat issues. Understanding when to seek expert help saves time and prevents potential system damage.
Signs of electrical issues
Electrical problems often manifest through specific indicators that require professional attention. Primarily, unresponsive controls or erratic behavior after battery replacement signal deeper electrical concerns. A certified technician possesses the expertise to handle complex wiring issues safely, especially when dealing with corroded, frayed, or damaged wires.
Safety Warning: Attempting to fix electrical issues without proper knowledge poses significant risks. Undoubtedly, handling internal wiring requires specialized tools and expertise to prevent system damage or personal injury.
Complex system problems
Occasionally, thermostat issues indicate broader HVAC system complications. Professional diagnosis becomes necessary when:
- The system repeatedly returns to default settings
- Temperature readings remain inaccurate despite calibration attempts
- Short cycling continues after basic troubleshooting
- Wi-Fi connectivity issues persist
Essentially, these symptoms might stem from hidden problems with power supply or internal circuitry. HVAC technicians possess advanced diagnostic tools to identify and resolve these intricate issues more efficiently than DIY attempts.
Warranty considerations
Warranty protection typically depends on professional handling of thermostat installations and repairs. Most manufacturers mandate specific requirements for warranty coverage:
- Professional installation must comply with manufacturer guidelines
- Certified contractors must conduct warranty repairs
- Installation documentation needs proper maintenance
- Warranty periods vary by model and installation type
Alternatively, attempting DIY repairs might void warranty coverage, leaving repair costs solely to the homeowner. Professional HVAC contractors ensure compliance with local building codes while maintaining warranty validity.
The expertise of certified technicians extends beyond simple repairs. These professionals:
- Make accurate diagnoses according to manufacturer standards
- Handle warranty claims efficiently for homeowners
- Ensure proper integration with existing HVAC systems
- Address system-wide issues comprehensively
Nonetheless, different thermostat models carry varying warranty terms. For instance, retail products typically include 1-2 year coverage, while professionally installed units often extend to 3-5 years. Professional technicians understand these nuances and can advise on the best course of action while preserving warranty benefits.
Conclusion
Resetting your thermostat after a battery change might seem daunting, though most issues resolve through simple procedures. Understanding your specific thermostat model proves essential, as each brand requires different reset methods – from Honeywell’s battery reversal technique to Nest’s outer ring press.
Basic troubleshooting steps solve many common problems. However, persistent issues like corrosion or electrical complications need professional attention. Professional HVAC technicians bring specialized knowledge and tools, ensuring your system runs efficiently while maintaining warranty coverage.
Remember, proper battery installation and regular maintenance significantly reduce reset-related problems. Following manufacturer guidelines and recognizing when to seek expert help keeps your HVAC system running smoothly throughout the year. Your comfort depends on a properly functioning thermostat – take time to understand its reset requirements and maintenance needs.