What Does DL Mean on Emerson Thermostat? Simple Fix Guide [2025]
Seeing a “DL” code on your Emerson thermostat can be confusing and concerning, especially when your heating or cooling system stops working properly. While “DL” actually stands for Dual Load, allowing control of two separate HVAC systems simultaneously, it can also indicate potential problems with your thermostat or HVAC system.
When this code appears, it might signal various issues ranging from power problems to communication errors or hardware malfunctions. We’ll walk you through the meaning of the DL code, common causes, and step-by-step solutions to get your thermostat working correctly again. If you’re experiencing this issue with your Emerson Blue Easy Reader Thermostat or other models, we’ve got you covered with practical troubleshooting steps before you need to call a professional.
Understanding the DL Code on Emerson Thermostats
The DL code on Emerson thermostats primarily serves two distinct purposes. First, DL stands for “Dual Load,” a feature that enables your thermostat to manage two separate heating or cooling systems at once. This functionality proves particularly useful in homes with multiple HVAC units.
What DL actually means
The interpretation of DL varies based on specific situations. In most cases, DL indicates that your display light is active. Furthermore, this code might appear during configuration menu access or heating/cooling mode operation. Additionally, on certain Emerson models, DL represents “Delay Mode,” which protects your system from short cycling.
Why the DL code appears
The DL code surfaces on your thermostat’s display for several reasons. Notably, power-related issues often trigger this code – particularly during instances where your thermostat struggles to communicate with the HVAC system. Communication errors between system components can likewise prompt the DL display. Moreover, the code might indicate that your furnace remains idle without an active connection to the thermostat.
Affected Emerson thermostat models
The DL code commonly appears across various Emerson thermostat models, including:
- Blue Easy Reader series
- Digital display models with dual system control capabilities
- Programmable thermostats with display light features
Each model might interpret the DL code slightly differently, depending on its specific features and programming. For instance, some units display “3 dL” during certain operational modes. Understanding these model-specific variations helps in proper diagnosis and troubleshooting of your particular unit.
Hardware malfunctions or loose wiring connections can trigger the DL display across all compatible models. Therefore, checking your specific model’s documentation proves essential for accurate interpretation of this code.
Common Causes of the DL Error Message
Problems with your Emerson thermostat’s DL display often stem from multiple sources. Understanding these causes helps pinpoint the exact issue affecting your system.

Display Light Configuration Issues
Display light problems primarily occur due to incorrect configuration settings in your thermostat’s menu system. The DL setting controls the backlight functionality, and improper adjustments can cause persistent display issues. Sometimes, even after battery replacement, the display light might stay on continuously or refuse to illuminate.
System Communication Problems
Communication failures between your thermostat and HVAC components manifest through the DL code. These issues typically surface when:
- The thermostat loses connection with wireless components
- System sensors stop communicating properly
- The furnace fails to respond to thermostat signals
Subsequently, these communication breakdowns can trigger error messages or cause your system to operate inefficiently. The thermostat might show “Failed” or display dashes to indicate lost connections with various components.
Hardware Malfunctions
Physical problems generally contribute to DL-related issues in several ways. Dirty components can interfere with proper functionality, whereas loose or corroded wiring connections often disrupt normal operation. Additionally, these hardware issues might include:
Power-related problems frequently trigger DL errors. A power spike can damage internal components, necessitating replacement. Nonetheless, before assuming hardware failure, checking for basic issues like loose terminal screws or damaged wiring connections proves essential.
The anticipator mechanism, although seemingly minor, can significantly impact system performance. Mechanical issues with this component may cause irregular cycling patterns or temperature discrepancies. Despite these challenges, many hardware problems can be resolved through proper maintenance and timely repairs.
When dealing with hardware malfunctions, it’s crucial to check both the thermostat’s internal components and its connection to your HVAC system. Jarring impacts or improper installation can throw off the thermostat’s calibration, consequently affecting its ability to maintain proper temperature control and display settings.
Step-by-Step Troubleshooting Guide
Following basic troubleshooting steps often resolves the DL code issue on your Emerson thermostat without requiring professional help. Let’s walk through each crucial step systematically.
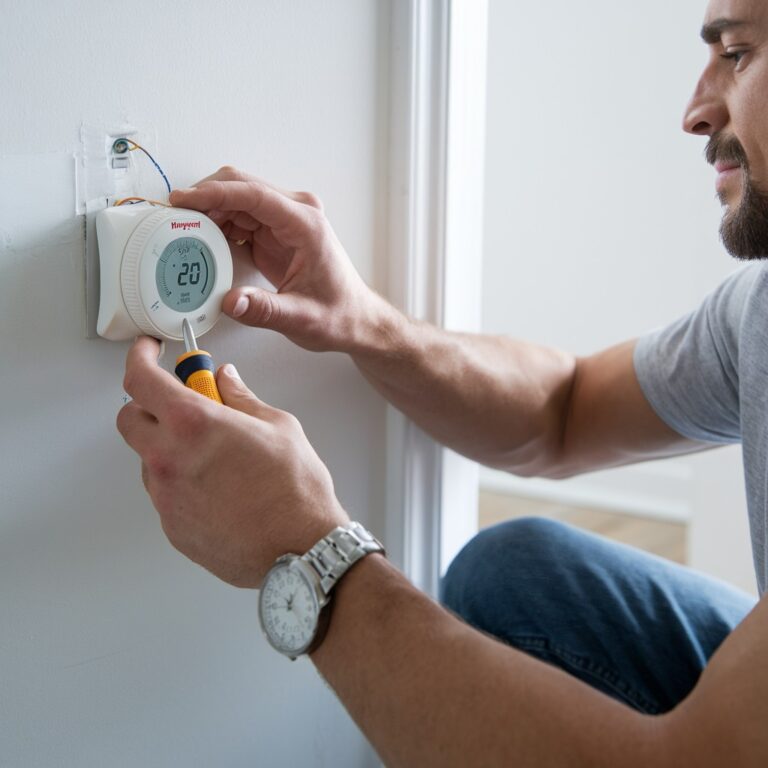
Checking power and wiring connections
First, inspect your system’s power supply. Head to your main circuit breaker box and check for any tripped breakers. Upon finding a tripped breaker, reset it and monitor if the DL code persists.
Next, examine all wire connections between your thermostat and HVAC system. Remove the thermostat from its wall mount and look for:
- Loose terminal connections
- Exposed or damaged wires
- Proper wire seating in terminal blocks
Make sure no bare wires stick out from under the terminal blocks, as this could create unwanted connections.
Resetting the thermostat configuration
A simple reset often clears the DL code. Here’s the proven reset procedure:
- Remove the batteries from your thermostat
- Reverse the batteries and insert them backward for 10 seconds
- Remove and reinsert the batteries in their correct orientation
Note: In rare instances, if you notice any smoking during this process, immediately remove the batteries.
For a complete system reset, press and hold both the temperature control buttons along with the FAN button simultaneously until the display goes blank.
Testing system components
After completing basic checks, run a diagnostic test of your system:
Set your SYSTEM switch to HEAT and raise the setpoint above room temperature. Within seconds, you should hear a soft clicking sound, indicating proper thermostat operation. If no click occurs after the reset, your unit might need replacement.
For cooling system verification, switch to COOL mode and lower the setpoint below room temperature. Remember that cooling systems might have up to a five-minute delay before activation.
If problems persist, check these additional components:
- Furnace power switch position
- Blower compartment door alignment
- Safety interlock engagement
By methodically working through these steps, you can identify and resolve many common issues causing the DL code to appear. However, if these steps don’t resolve the problem, you might need to consider professional diagnostic services.
Advanced Diagnostic Procedures
Modern Emerson thermostats come equipped with sophisticated diagnostic capabilities that help identify and resolve complex issues. These advanced features specifically target system performance and communication problems that might trigger the DL code.
Using built-in diagnostic tools
Emerson’s Comfort Alert diagnostic system actively monitors your air conditioning system’s performance. The system uses a yellow LED that flashes specific codes to indicate various issues:
- 1 Flash: Extended runtime
- 2 Flashes: System pressure problems
- 3 Flashes: Short cycling issues
- 4 Flashes: Rotor lock condition
- 5-9 Flashes: Various circuit and voltage issues
Rather than relying solely on time or temperature readings, the built-in algorithm focuses primarily on overall system performance to make intelligent decisions about staging and operation.
Testing communication protocols
Emerson thermostats utilize specific communication standards that require proper configuration. The system operates on an 802.11n 2.4GHz radio network and uses DHCP for IP address assignment.
For optimal performance, your Wi-Fi signal strength should exceed -70 dbs at the thermostat location. Accordingly, you can use a Wi-Fi analyzer app to verify signal strength and identify the strongest channel in your thermostat’s vicinity.
The system essentially requires these outbound ports to be available:
- TCP port 8091 for cloud services
- UDP port 8092 for updates
- Ports 80 and 443 for newer radio updates
Checking system compatibility
The thermostat’s microprocessor employs an advanced algorithm that adapts to your specific system configuration. This intelligent system typically monitors performance patterns to determine optimal staging times for heating and cooling operations.
The dual fuel logic feature specifically tracks system behavior without requiring an outdoor sensor. Instead, it analyzes performance metrics to determine the best time to transition between heat pump and furnace operation.
When verifying compatibility, consider that Sensi thermostats are designed to work with traditional 24VAC controlled heating and cooling equipment. The configuration options for the O*/B terminal accommodate:
- Conventional systems up to 2H/1C or 1H/2C
- Heat pump systems up to 2H/1C
- Most zone panels and boilers
Remember that improper system configuration remains the primary cause of technical service calls. Thus, carefully reviewing your installation guide and system settings proves crucial for optimal performance.
Professional Repair Options
First and foremost, knowing when to seek professional help for your Emerson thermostat can save both time and money. Regular maintenance by qualified technicians ensures optimal system performance and extends equipment life.
When to call an HVAC technician
Professional intervention becomes necessary in these situations:
- Abnormal sounds from your HVAC system
- Sudden spikes in energy usage
- Temperature readings that don’t match thermostat settings
- Failed DIY troubleshooting attempts
In fact, scheduling routine maintenance at least once yearly keeps your warranty valid and helps prevent major system failures. Technicians thoroughly inspect your system, making minor repairs during these visits.
Estimated repair costs
Professional HVAC technician labor typically ranges between $50 to $100 per hour, not including parts or materials. Complex thermostat issues require licensed professionals to ensure safety and proper system operation.
The total cost for thermostat installation or replacement in a 2,000-square-foot home typically falls between $100 and $255, including professional labor. Most local electricians can complete the installation in under two hours.
Additional cost factors might include:
- Wiring repairs or replacements
- System compatibility checks
- Multiple unit installations
- Minor drywall repairs for wire routing
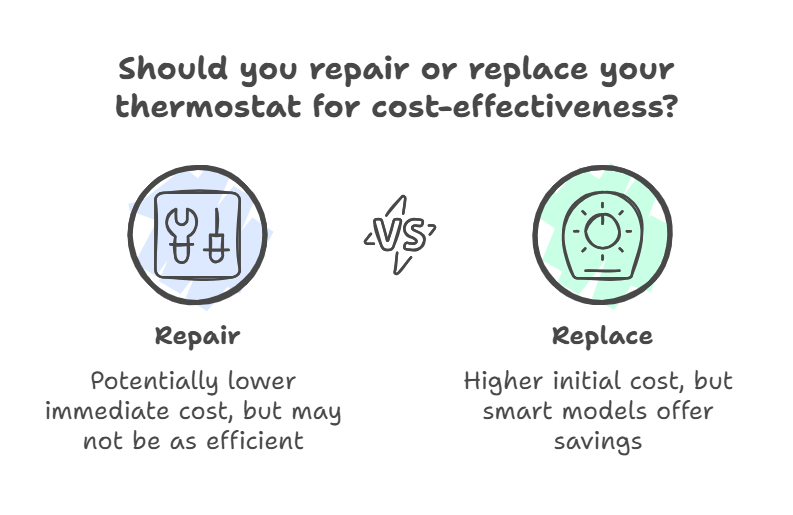
Primarily, if repair costs approach replacement prices, installing a new unit often makes more financial sense. Smart thermostats, indeed, can provide annual savings of up to $200.
Replacement considerations
When contemplating thermostat replacement, several factors deserve attention. Typically, thermostats last 10 years, though some may function properly for up to 30 years. As a result, age alone shouldn’t be the sole determining factor for replacement.
Key indicators that suggest replacement over repair include:
- Continuous system operation issues
- Display malfunctions
- Inconsistent temperature control
- Frequent cycling problems
In addition to these factors, warranty coverage significantly influences the decision. Defective units under warranty qualify for manufacturer-covered repairs or replacement through licensed service providers.
For new installations, consider that running wires to your HVAC system adds $100 to $200 to the total cost. Ultimately, wireless smart thermostats might prove more cost-effective, certainly offering better long-term value despite higher upfront costs.
Before making final decisions, professional diagnostics can identify whether issues stem from the thermostat itself or indicate broader HVAC system problems. Outside units might have various issues, such as damaged wiring, faulty circuit boards, or capacitor problems. These underlying problems require professional expertise for proper diagnosis and repair.
Conclusion
Understanding the DL code on your Emerson thermostat certainly helps tackle common issues without unnecessary panic. While DL primarily indicates Dual Load functionality, display light status, or delay mode, various factors can trigger this code unexpectedly.
Simple troubleshooting steps often resolve DL-related problems quickly. Power cycling your thermostat, checking wire connections, or performing a basic reset might fix the issue. However, persistent DL codes could signal deeper system problems requiring professional attention.
A properly functioning thermostat saves money and ensures comfort throughout your home. Therefore, regular maintenance checks prove essential for optimal performance. Professional HVAC service typically costs between $50 and $100 per hour, making it a worthwhile investment compared to complete system failures or replacements.