Old Dial Thermostat Not Working? The Simple Fix Guide You Need Today
Is your old dial thermostat not working properly? You might be surprised to learn that this small device could be costing you significantly more in electricity bills due to inefficiency and wasted energy.
Whether you’re seeing a dark display or noticing temperature discrepancies between your thermostat setting and the actual room temperature, these issues often create the misconception of a serious HVAC system problem. However, the solution might be simpler than you think. In fact, basic maintenance like cleaning or proper placement in a neutral temperature area can often resolve these common issues.
But here’s the thing – before you spend $18 on a service call or $25-$50 on a new Honeywell thermostat, let’s explore some practical solutions. In this guide, we’ll walk you through simple troubleshooting steps to get your old mechanical thermostat back on track and help you decide whether it needs a repair or replacement.
Common Signs Your Old Dial Thermostat is Failing
Recognizing the warning signs of a failing dial thermostat helps prevent unexpected heating and cooling system breakdowns. Understanding these indicators allows for timely intervention and maintains optimal home comfort.
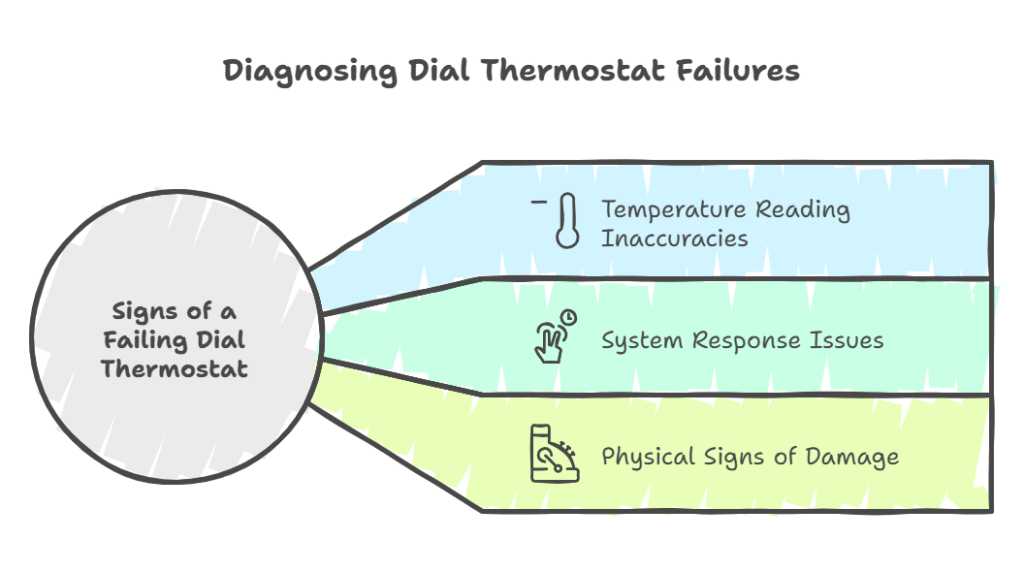
Temperature reading inaccuracies
Temperature reading problems initially appear when your home feels noticeably warmer or cooler than what your thermostat displays. A malfunctioning temperature sensor stands out as the primary cause of these discrepancies. Furthermore, excessive dust accumulation inside the thermostat can interfere with sensor functionality.
An unlevel thermostat position, particularly in mercury-based models, leads to incorrect temperature readings. Additionally, placement near direct sunlight or doorways affects accuracy by exposing the thermostat to temperature fluctuations that don’t reflect your home’s actual temperature.
Heating/cooling system response issues
System response problems manifest through several distinct behaviors:
- Short cycling (system turns on and off frequently)
- Delayed or no response to temperature adjustments
- Continuous system operation without reaching set temperature
- Random system activation or deactivation
When you adjust the thermostat settings, you should hear soft clicking sounds followed by system activation. Consequently, if these responses are absent or delayed, it often indicates internal wiring issues or a failing control board.
Physical signs of damage
Visible damage provides clear indicators of thermostat failure. A bent control lever, frayed wiring, or a damaged housing suggests the unit needs attention. Moreover, loose or disconnected wires inside the thermostat frequently cause communication problems with your HVAC system.
The control board, which manages communication between your thermostat and HVAC system, may show signs of wear through erratic operation. Notably, if your mechanical thermostat’s anticipator appears frozen or damaged, it can cause temperature regulation problems.
Regular inspection of these components helps identify potential issues early. When multiple signs appear simultaneously, particularly in thermostats over ten years old, replacement often proves more practical than repair.
Essential Safety Checks Before Troubleshooting
Safety stands as the cornerstone of any thermostat troubleshooting attempt. Understanding proper precautions prevents accidents and ensures successful repairs.
Power considerations
First and foremost, turn off the power to your HVAC system at the circuit breaker. A voltage meter check remains essential to confirm no live wires exist in the thermostat. Accordingly, inspect your circuit breaker panel, specifically looking for clearly labeled HVAC controls.
Some key power safety steps include:
- Testing power connection with a voltage meter
- Confirming circuit breaker status
- Checking for any signs of electrical damage
- Verifying proper voltage specifications
When to avoid DIY repairs
Professional help becomes necessary under specific circumstances:
- Circuit breaker repeatedly trips
- Burning smells or smoke appear
- Thermostat shows erratic behavior
- HVAC system fails to activate
- Lights flicker during system operation
- Complex wiring issues emerge
Primarily, DIY installations risk voiding warranties, as manufacturers often require licensed professional installation. Therefore, attempting repairs without proper knowledge might lead to system malfunctions, electrical circuit shorts, or potentially costly damages.
Required tools and materials
A successful troubleshooting process demands specific tools. The essential toolkit includes:
- Screwdriver with multiple heads
- Voltage tester
- Level
- Wire stripper
- Pliers
- Electrical tape
- Putty knife
- Hammer
- Pencil
Nevertheless, smart or WiFi thermostat installations often require additional expertise. Specifically, these modern units might need C-wire installations or complex wiring configurations that demand professional knowledge.
Quick Diagnostic Steps for Mechanical Thermostats
Systematic diagnosis helps pinpoint exact issues with mechanical thermostats, enabling effective repairs or informed replacement decisions.
Testing power connection
Begin power testing by setting your multimeter to the appropriate voltage range, typically 24V for most residential thermostats. Subsequently, place the red probe on the R (red) terminal and the black probe on other terminals to verify proper voltage readings.
For battery-operated units, a blank display typically indicates dead batteries. Essentially, hardwired thermostats should show a wire connected to the C (common) terminal, while R represents power, W for heat, Y for cooling, and G for fan connections.
Checking mercury switch alignment
Mercury switch verification requires careful observation of the mercury bulb movement. Generally, the mercury tube should tilt smoothly as you adjust the temperature dial. The mercury inside should make consistent contact with wire connections when the temperature selector moves.
To test mercury switch functionality:
- Remove wire connections from contact screws
- Check continuity across contact points
- Verify open circuit when mercury isn’t touching contacts
- Confirm closed circuit when mercury makes contact
- Test heating and cooling circuits separately
Verifying bimetal coil function
The bimetal strip, primarily responsible for temperature sensing, consists of two metal strips working together. Ordinarily, these strips control the electrical circuit by responding to temperature changes. A malfunctioning bimetal strip typically results from:
- Aging wiring
- Extreme temperature variations
- Accumulated dust
For proper calibration, locate the adjustment mechanism near the temperature-sensing coil. Typically, use a small screwdriver to make minor adjustments, allowing time between changes to verify accuracy. The heat anticipator, when present, requires precise alignment to prevent short cycling or temperature regulation issues.
Remember that mechanical thermostats usually last around 10 years. After this period, aging components might affect performance and require more frequent adjustments or replacement.
Simple DIY Fixes for Old Analog Thermostats
Regular maintenance keeps old dial thermostats functioning optimally, often extending their lifespan and preventing costly replacements.
Cleaning and maintenance tips
Dust accumulation inside your thermostat affects its accuracy and can increase energy bills by up to 7%. First, turn off power at the circuit breaker for safety. Remove the cover carefully – some models have screws while others simply snap off.
For thorough cleaning, use a soft paintbrush or compressed air to remove debris from internal components. Primarily focus on the bimetal coil and contact points, as these areas directly affect temperature sensing accuracy. Clean the switch contacts using a Q-tip moistened with isopropyl alcohol.
Following a maintenance schedule proves crucial – clean the exterior weekly and perform internal cleaning every six months. Alternatively, use compressed air designed for computer cleaning to reach tight spaces without risking damage.
Calibration adjustment steps
Accurate calibration ensures proper temperature control and system efficiency. To verify calibration:
- Place a reliable thermometer near the thermostat
- Wait 15 minutes for accurate readings
- Calculate the temperature difference
- Enter calibration mode according to your model
- Adjust settings to match thermometer reading
- Test system response
The heat anticipator requires special attention. If your furnace cycles too frequently, move the adjustment lever away from the “longer” setting. Ordinarily, allow two to three hours between adjustments to evaluate effectiveness.
Wire connection repairs
Loose or corroded wiring typically causes communication problems between your thermostat and HVAC system. As a result, you might experience erratic heating or cooling patterns. Turn off power before inspecting wires.
Check for these common issues:
- Loose terminal screws
- Frayed wire sections
- Corrosion on connections
- Disconnected wires
For wire repairs, use needle-nose pliers to grip and position wires around screws. In addition to tightening connections, inspect for corrosion – if found, use a wire stripper to remove damaged sections and reveal fresh wire.
Important Safety Note: Never handle electrical components without first shutting off power at the circuit breaker. Finally, after completing repairs, restore power and test the system through all operating modes to ensure proper function.
When to Replace vs Repair Your Dial Thermostat
Making informed decisions about repairing or replacing an old dial thermostat requires careful evaluation of multiple factors. Understanding these elements helps determine the most cost-effective and practical solution for your home.
Age and condition assessment
The lifespan of mechanical thermostats typically ranges from 10 to 35 years. Ordinarily, performance decline begins around the 10-year mark. Primarily, older thermostats exhibit several key indicators suggesting replacement:
- Programmed settings changing independently
- Short battery life or persistent power issues
- Dusty internal components
- Wiring complications
- Circuit board malfunctions
- Incorrect placement affecting readings
Alternatively, thermostats under warranty might qualify for free repairs or replacements. A thorough assessment includes checking the heat anticipator adjustment capabilities and examining primary circuit board functionality.
Cost comparison analysis
The financial aspects of thermostat decisions involve several considerations. Typically, new thermostat installations, including labor costs, range from USD 50.00 to USD 500.00. Studies demonstrate that upgrading from an old dial thermostat to a programmable model saves homeowners 10 to 15% on energy bills.
Repair considerations include:
- Basic maintenance costs
- Wire connection repairs
- Calibration services
- Component replacement expenses
Presently, smart thermostats represent a significant investment but offer substantial returns. Installation complexity varies – while two-wire manual thermostat replacements can be DIY projects, systems with 10-12 wires typically require professional installation.
Modern replacement options
When upgrading from dial thermostats, several modern alternatives exist. Battery-powered digital thermostats offer a straightforward replacement option for basic two-wire systems. Smart thermostats provide advanced features but might require additional considerations:
C-wire Requirements:
- Some models need dedicated power through C-wire installation
- Nest thermostats can charge batteries through existing wires
- Adapter kits convert existing wires for compatibility
Installation Timing: The ideal time for replacement occurs when:
- Installing new HVAC equipment
- Experiencing frequent system cycling issues
- Noticing significant energy bill increases
Undoubtedly, smart thermostats enhance home comfort through pattern recognition and remote control capabilities. These units typically require 30 minutes to 3 hours for installation, depending on system complexity and necessary rewiring.
For homes without C-wire configurations, battery-powered options like the Honeywell TH6320ZW2003 T6 Pro Series provide reliable alternatives. These models maintain functionality without requiring extensive electrical modifications, making them suitable for older heating systems.
The decision between repair and replacement ultimately depends on several factors:
- Current thermostat age and condition
- Existing warranty coverage
- Energy efficiency goals
- Budget constraints
- HVAC system compatibility
Conclusion
Old dial thermostats, though reliable, eventually need attention through repair or replacement. Understanding the signs of failure and proper troubleshooting steps helps maintain optimal home comfort while preventing unnecessary expenses.
Regular maintenance stands essential for extending thermostat lifespan. Simple actions like cleaning, calibration checks, and wire inspections can resolve many common issues. Though DIY fixes work well for basic problems, safety remains paramount – professional help becomes necessary for complex electrical issues or modern upgrades.
Age serves as a crucial factor when deciding between repair and replacement. Thermostats older than 10 years might benefit more from an upgrade, especially considering the potential energy savings of 10-15% with newer models. Smart thermostats offer enhanced control and efficiency, though installation complexity varies based on existing wiring.
Remember, successful thermostat maintenance depends on proper diagnosis and careful consideration of repair costs versus replacement benefits. Making informed decisions about your thermostat ensures comfortable temperatures while maximizing energy efficiency throughout your home.